
BASIC EXPOSURE BLENDING
One of the biggest problems facing any landscape photographer is how to control the range of brightness between the sky and land. If an exposure is based on the sky alone it will leave the foreground too dark and an exposure for the land will loose all definition in the sky with burnt out highlights.
The old traditional way, and what many photographers still use is the GND or graduated neutral density filter. This involves a gradient filter to be placed over the brighter (sky region) to be toned down so the capture medium can retain both shadow and highlight detail in one go.
This procedure has many benefits and pit falls. If for instance you are taking a mountain scene at sunset, what will happen if a GND is placed over the mountains? A darker transition line of the filter will appear to cut through, leaving the lower half of the image exposed correctly, yet the mountain peaks and sky will be dark. But we want the mountain peaks to be the same as the foreground.
This is where ‘digital blending’ has its place, and how the vast majority of my images are created. It allows for very complicated scenes to perfectly exposed for all areas. A minimum of two exposures should be used, with practice and patience 3,4 or more can be added. Sometimes only the smallest of areas maybe selected for inclusion.
Whilst there are many ways of blending, this is by far the simplest method to show. A Google search will turn up plenty of other options and discussions, both for and against digital blending.
Some photographers use HDR (High Dynamic Range) techniques. This generally leaves a much to be desired image, usually flat in contrast and edge halos where the computer thinks it know best. Its easily spotted and mostly looks `fake`. Any craftsman will tell you perfection takes time. So does manual blending, but the results speak for themselves.
The method
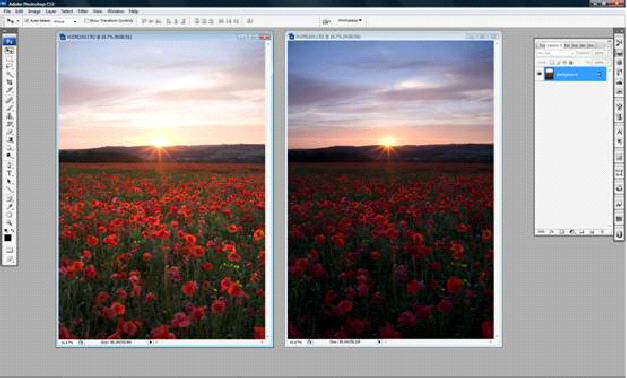
When taking your picture, take two exposures. One for the sky and one for the ground. Make sure all settings are equal apart form the shutter speed. A tripod is a must.
Process one file for the sky and one for the foreground in your raw converter and import both files.
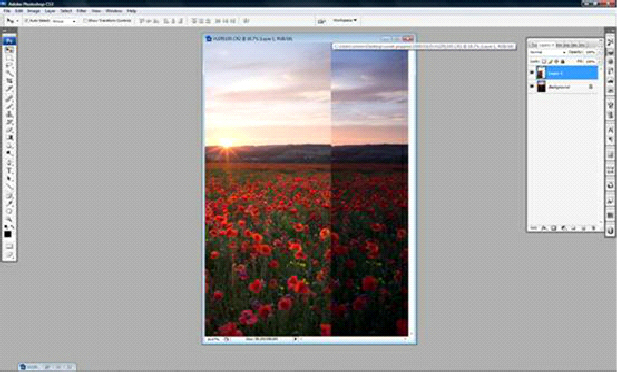
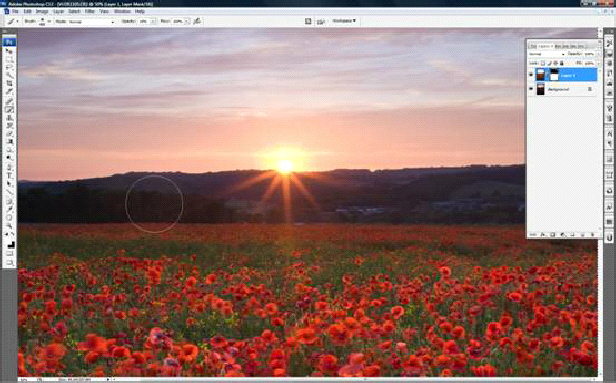
Using the move tool, drag the lighter image into the dark image. This will create a new layer in the layers palette. Select all and align images horizontally and vertically.
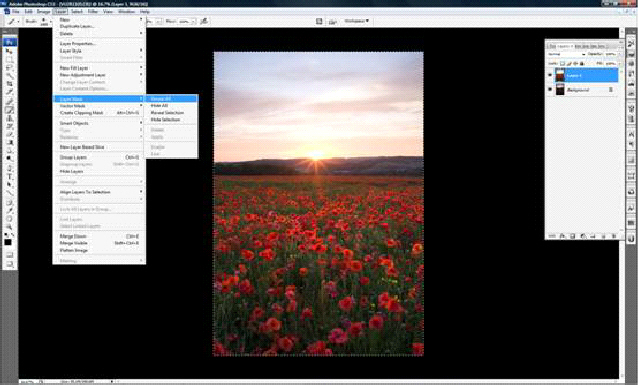
Then proceed to layer in the tool bar. Scroll down to layer mask -
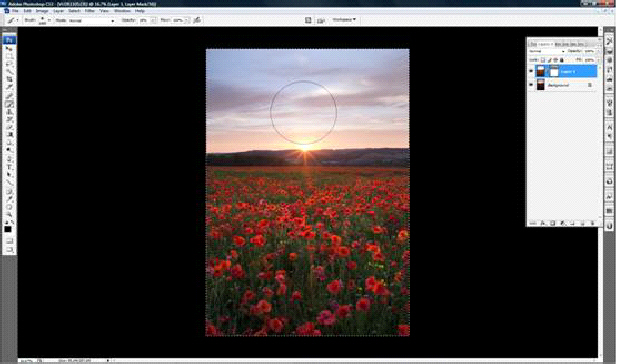
Then select the brush tool. Adjust the brush settings to: opacity 15% flow 100%. The brush size should be about ½ to 1/3 of the sky area. Make sure the foreground colour is black. Hold down the left mouse button, drag and paint in the new sky. In the layers palette you will see the darkening of the mask. This indicates the new sky emerging through the old. A black foreground colour paints in the sky, white removes any areas which may need fine tuning. Perhaps with a smaller brush size around awkward areas.
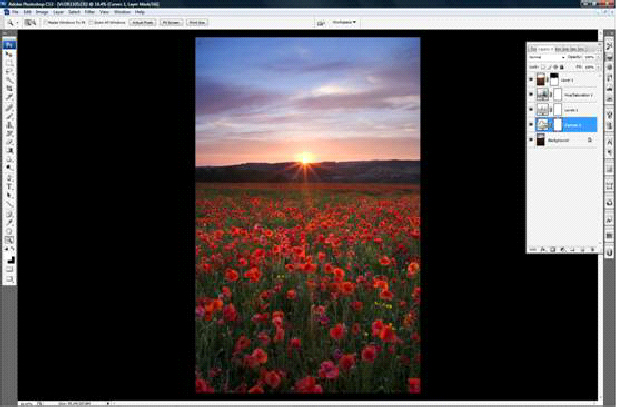
When painting in the new sky, inevitably some areas will be come dark which you do not want. Select the white foreground colour, zoom in and undo the areas with a small brush size. In this picture I wanted to retain the sunburst effect, so I painted these back in.
When you have finished painting in the new areas, you can carry out any further adjustments you normally do. Once completed flatten your image. Job done.